HTTPS Setup
This guide demonstrates how to configure HTTPS with a self-signed certificate. It is assumed you have your own HTTPS certificate.
Configure a Certificate Authority
This example uses the Easy-RSA management tool to create a Certificate Authority (CA). This will allow you to create, sign, and install TLS/SSL certificates for internal testing.
If purchasing a certificate from a third-party CA, it is recommended to follow their Certificate Signing Request (CSR) process. If you're using these official files, please skip the CA creation section of this guide.
Install Easy-RSA
Prerequisites:
- Ubuntu 22.04 or higher
- Non-root user with sudo privilege (the row64 user is okay)
easy-rsa is a Certificate Authority management tool that you can use to generate a private key and a public root certificate, which you will then use to sign requests from clients and servers that rely on your CA.
Run the following commands to install Easy-RSA:
sudo apt update
sudo apt install easy-rsa -y
Prepare a Public Key Infrastructure Directory
Create an easy-rsa directory in your /usr/Row64 folder:
cd /usr
sudo mkdir Row64
sudo chown -R row64:row64 Row64/
cd Row64/
mkdir easy-rsa
Symlink to the easy-rsa package files and initialize the PKI in your directory:
cd /usr/Row64/easy-rsa/
ln -s /usr/share/easy-rsa/* /usr/Row64/easy-rsa/
./easyrsa init-pki
Set the Certificate Authority Details
Create a file called vars in your directory and paste in the following text:
set_var EASYRSA "/usr/Row64/easy-rsa"
set_var EASYRSA_REQ_COUNTRY     "YOUR_COUNTRY"
set_var EASYRSA_REQ_PROVINCE    "YOUR_STATE"
set_var EASYRSA_REQ_CITY        "YOUR_CITY"
set_var EASYRSA_REQ_ORG         "YOUR_ORGANIZATION_NAME"
set_var EASYRSA_REQ_EMAIL       "your.email@example.com"
set_var EASYRSA_REQ_OU          "Dev"
set_var EASYRSA_ALGO            ec
set_var EASYRSA_DIGEST          "sha512"
set_var EASYRSA_AUTO_SAN        1
Change the following variable values to reflect your information:
EASYRSA_REQ_COUNTRYEASYRSA_REQ_PROVINCEEASYRSA_REQ_CITYEASYRSA_REQ_ORGEASYRSA_REQ_EMAILEASYRSA_REQ_OU
Leave the remaining variable values how they are.
Create the Root Key Pair
Create the root public and private key pair for your Certificate Authority. In your directory, run:
./easyrsa build-ca
Use temp7 as the passphrase.
You will also be asked to confirm the Common Name (CN) for your Certificate Authority (CA). The CN is the name used to refer to this machine in the context of the Certificate Authority.
CN: Row64_CA
This creates two files:
easy-rsa/pki/ca.crtis the CA’s public certificate file. Users, servers, and clients will use this certificate to verify that they are part of the same web of trust. Every user and server that uses your CA will need to have a copy of this file.easy-rsa/pki/private/ca.keyis the private key that the CA uses to sign certificates for servers and clients.
Distributing the Certificate
Any user or server that needs to verify the identity of another user or server in your network should have a copy of the ca.crt file imported into their operating system’s certificate store.
Now that you are a Certificate Authority, you can create and sign certificates.
Creating and Signing Certificates
Before you start, make sure you have openssl installed.
sudo apt update
sudo apt install openssl
Set up a folder for the Certificate Signing Requests (CSR) and certificates:
mkdir /usr/Row64/Certificates
cd /usr/Row64/Certificates
mkdir DashServer
cd DashServer
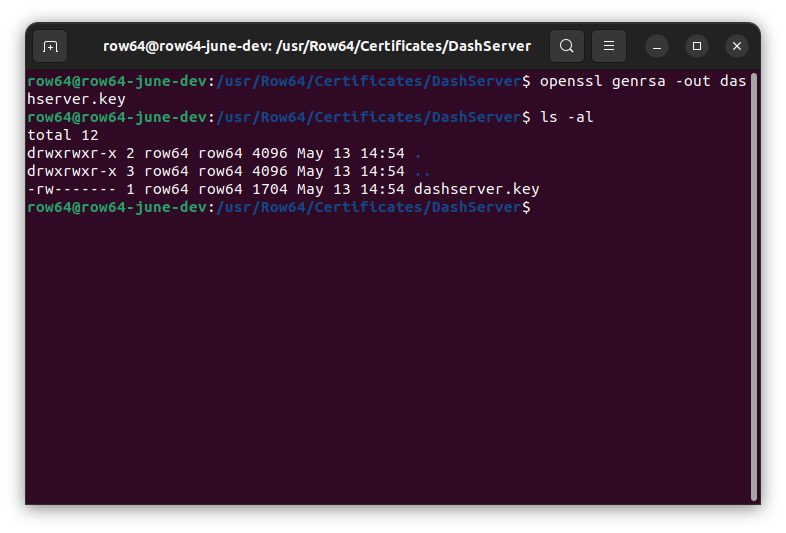
Generate a private key that can be used for the CSR:
openssl genrsa -out dashserver.key
Create the Certificate Signing Request
For the following command, you must update the subj and config fields to match your environment. The command provided in this document simply provides dummy data.
In the command, change the values in the subj field to match your information. Specifically, modify the values for the following fields: C, ST, L, O, OU, CN, emailAddress.
In the config field, change the IP value to be the IP address of your Row64 Server (you can use ifconfig to get your IP address).
openssl req \
-new \
-key dashserver.key \
-out dashserver.req \
-subj "/C=YOUR_COUNTRY/ST=YOUR_STATE/L=YOUR_CITY/O=YOUR_ORGANIZATION, Inc./OU=Dev/CN=192.168.0.54/emailAddress=your.email@example.com" \
-reqexts SAN \
-extensions SAN \
-config <(cat /etc/ssl/openssl.cnf <(printf '[SAN]\nsubjectAltName=DNS:hostname,IP:192.168.0.54'))
Note
Chrome 58+ no longer matches the Common Name (CN) in certs. Now it uses Subject Alternative Names (SAN) instead. SAN must contain proper DNS or IP entry. When DNS is used, it should be a resolvable FQDN name. When an IP address is used, it should be explicitly specified as such within the SAN chain.
Verify the CSR contents:
openssl req -in dashserver.req -noout -subject

Send the CSR to the CA Server
If the CSR machine is not the same as the CA machine, then you need to send the CSR to the CA machine. You can use SCP to transfer the request to the CA machine /tmp folder:
scp dashserver.req YOUR_USER@YOUR_CA_SERVER_IP:/tmp/dashserver.req
(Replace YOUR_USER@YOUR_CA_SERVER_IP with your information).
If you are on the same machine, just copy it to the /tmp folder:
cd /usr/Row64/Certificates/DashServer
cp dashserver.req /tmp/dashserver.req
Import the CSR to the CA
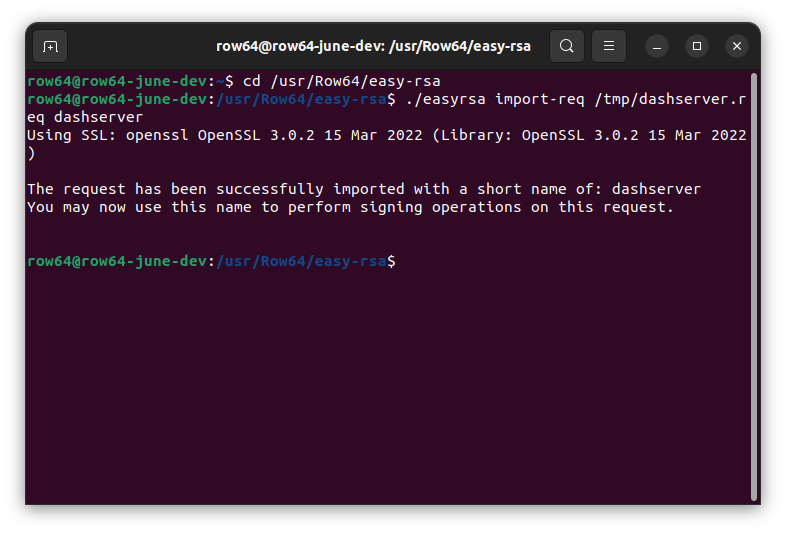
Make sure you’re on the machine with the CA (where you installed easy-rsa).
Run the following commands:
cd /usr/Row64/easy-rsa
./easyrsa import-req /tmp/dashserver.req dashserver
Note
If you already have a request in the easy-rsa/pki folder with the dashserver name, you’ll have to name it something else.
Sign the CSR
Use the sign-req option to sign the request. The request type can either be client, server, or ca. We’ll use server since it’s the Dashboard Server.
./easyrsa sign-req server dashserver
When asked to confirm the request details, enter yes.
When prompted to enter a passphrase for the ca.key, use temp7.
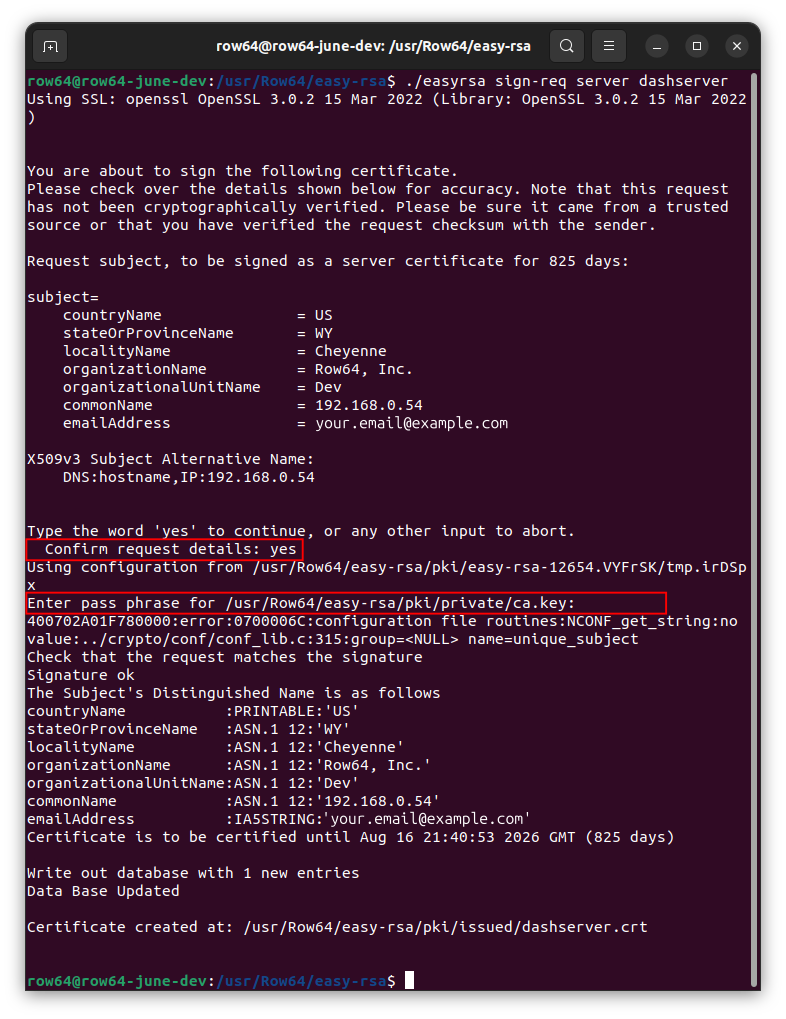
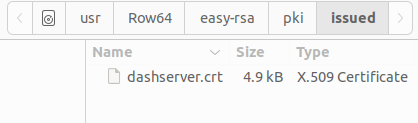
This will create a .crt file at the following location: /usr/Row64/easy-rsa/pki/issued/dashserver.crt.
Send to Requesters
If the CSR machine is NOT the same as the CA server machine, then use SCP to transfer the request back:
scp pki/issued/dashserver.crt YOUR_USER@YOUR_SERVER_IP:/tmp
scp pki/ca.crt YOUR_USER@YOUR_SERVER_IP:/tmp
(In both commands, change YOUR_USER@YOUR_SERVER_IP according to your setup).
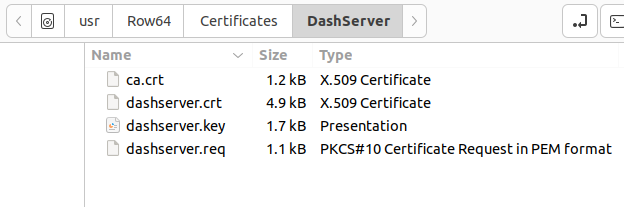
Since we’re on the same machine, we’ll just copy the signed certificate and the CA certificate back:
cp /usr/Row64/easy-rsa/pki/issued/dashserver.crt /usr/Row64/Certificates/DashServer/dashserver.crt
cp /usr/Row64/easy-rsa/pki/ca.crt /usr/Row64/Certificates/DashServer/ca.crt
Update Config Paths
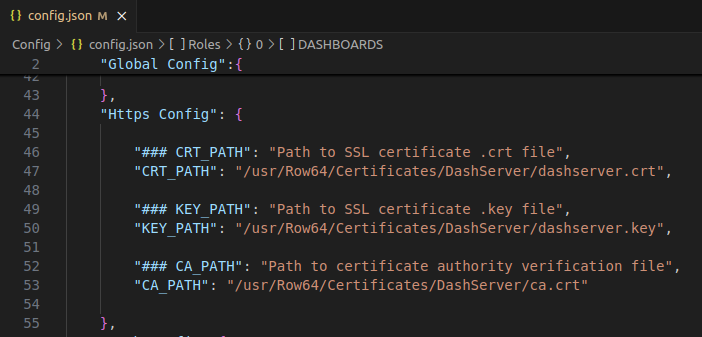
Make sure the config.json HTTPS config paths are correct. Open the Row64 Server config file at: /opt/row64server/conf/config.json
Set the "Global Config" section "WEBSERVER_PROTOCOL" field to "https".

Modify the 'Https Config" section paths to point to where your certificates are stored.
Note
If you are setting up with a secure login, make sure you have a user table made before you run your server.
Save your changes.
Restart the Row64 Server:
sudo systemctl restart row64server
Other Notes
These are useful OpenSSL commands for inspecting certificates:
| Command | Description |
|---|---|
openssl req -text -noout -verify -in domain.csr |
View the contents of a .csr or .req |
openssl x509 -text -noout -in domain.crt |
View the contents of a certificate in plain text |
openssl verify -verbose -CAfile ca.crt domain.crt |
Verify that a certificate was signed by a specific CA |
(Replace domain with your file names and ca with the certificate authority .crt name).
Install the Signed Certificate on the Apache Server
Modify the Apache .conf file. Back up the original default-ssl.conf file just in case.
cd /etc/apache2/sites-available/
sudo cp default-ssl.conf default-ssl.conf.old
sudo subl default-ssl.conf
Change the following parts:
#   SSL Engine Switch:
#   Enable/Disable SSL for this virtual host.
SSLEngine on

#   A self-signed (snakeoil) certificate can be created by installing
#   the ssl-cert package. See
#   /usr/share/doc/apache2/README.Debian.gz for more info.
#   If both key and certificate are stored in the same file, only the
#   SSLCertificateFile directive is needed.
SSLCertificateFile /usr/Row64/Certificates/DashServer/dashserver.crt
SSLCertificateKeyFile /usr/Row64/Certificates/DashServer/dashserver.key
SSLCertificateChainFile /usr/Row64/Certificates/DashServer/ca.crt
Set up SSL in Apache
Enable the SSL host and restart apache:
sudo a2enmod ssl
sudo a2ensite default-ssl.conf
sudo service apache2 restart
Using a Self-Signed Certificate
In order to use your self-signed certificate, you will need to recognize your Certificate Authority (CA) that you created. Otherwise, the TLS handshake will fail when you attempt to connect from the Row64 Studio application or when connecting to Dashboards on the browser.
The following instructions detail how to install the ca.crt certificate on the machine(s) where you plan to access the Row64 Studio and Dashboards.
Import Certificates to Linux
If you are accessing Dashboards through a Linux browser, then you can to install your ca.crt globally on the machine. If you don’t do this step, on the machine with Studio, Studio will not be able to complete the TLS handshake. The MMA step is Window’s version of this step.
For Ubuntu and Debian:
sudo cp /tmp/ca.crt /usr/local/share/ca-certificates/
sudo update-ca-certificates
For CentOS, Fedora, and RedHat:
sudo cp /tmp/ca.crt /etc/pki/ca-trust/source/anchors/
sudo update-ca-trust
Note
If you are using Firefox as your browser, Firefox does not use the local operating system's certificate store. To address this, please see the Import Certificates to Firefox section below.
Tip
You may want to run command with flag -f, as in sudo update-ca-certificates -f to ensure the global cert is updated.
Import Certificates to macOS
If you access dashboards through a macOS client, you can install your ca.crt globally on the machine. You can do this either through the command line or through the Keychain app.
Via the command line:
sudo security add-trusted-cert -d -r trustRoot -k /Library/Keychains/System.keychain ca.crt
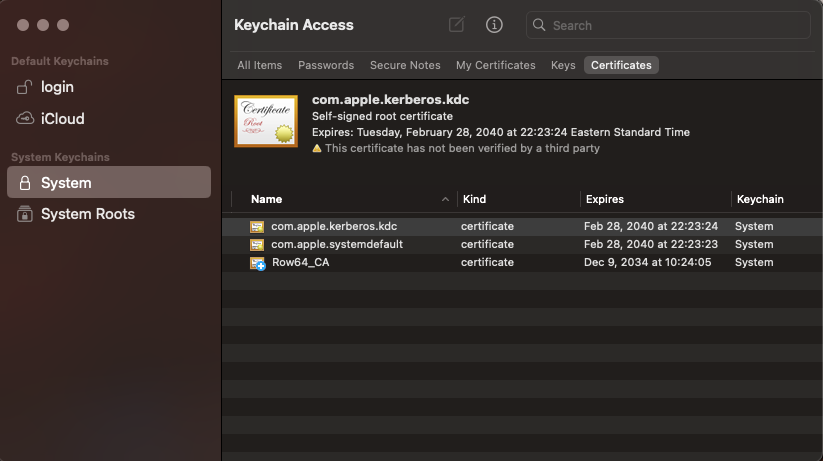
Via the KeyChain app:
- Open the "Keychain Access" application on your Mac, which you can find in Applications > Utilities.
- In the left sidebar, choose the "System" keychain.
- Locate the downloaded CA certificate file and drag it directly into the Keychain Access window.
- Double-click the imported certificate, go to the "Trust" section, and select "Always Trust" depending on your needs.
- Once installed, you can confirm in the KeyChain app your certificate is installed in the system folder under certificates->system
Import Certificates to Windows
Use MMC on Windows to install the certificate.
- Open the MMC. You cna select Start, then Run, then MMC.
- Go to File, then find Add / Remove Snap In.
- Double-click Certificates.
- Select Computer Account.
- Select Local Computer then Finish.
- Exit the Snap-In window by selecting OK.
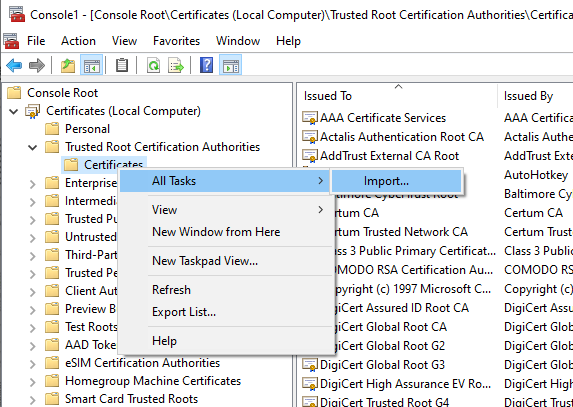
- Select the plus icon (+) next to Certificates, then Trusted Root Certification Authorities, then Certificates.
- Right-click Certificates. Then, select All Tasks, then Import.
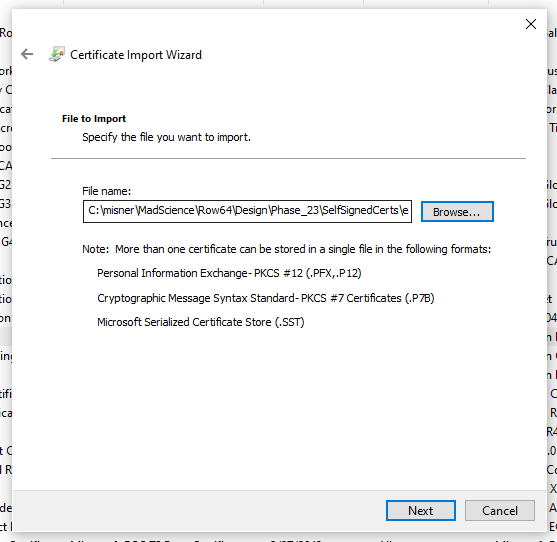
- Select Next, then Browse, and select the certificate you want to import. When you've found it, select Open, then Next.
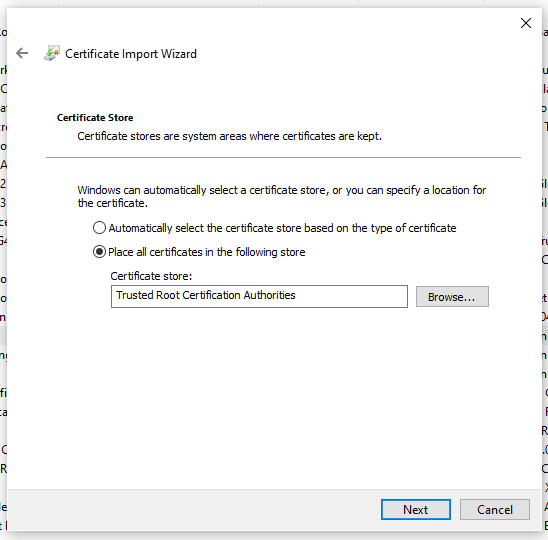
- Select the option to Automatically select the certificate store based on the type of certificate.
- Select Finish.
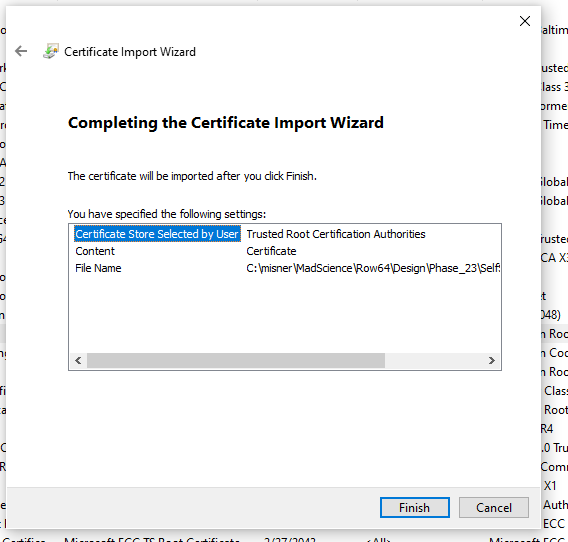
Now, we see it here:
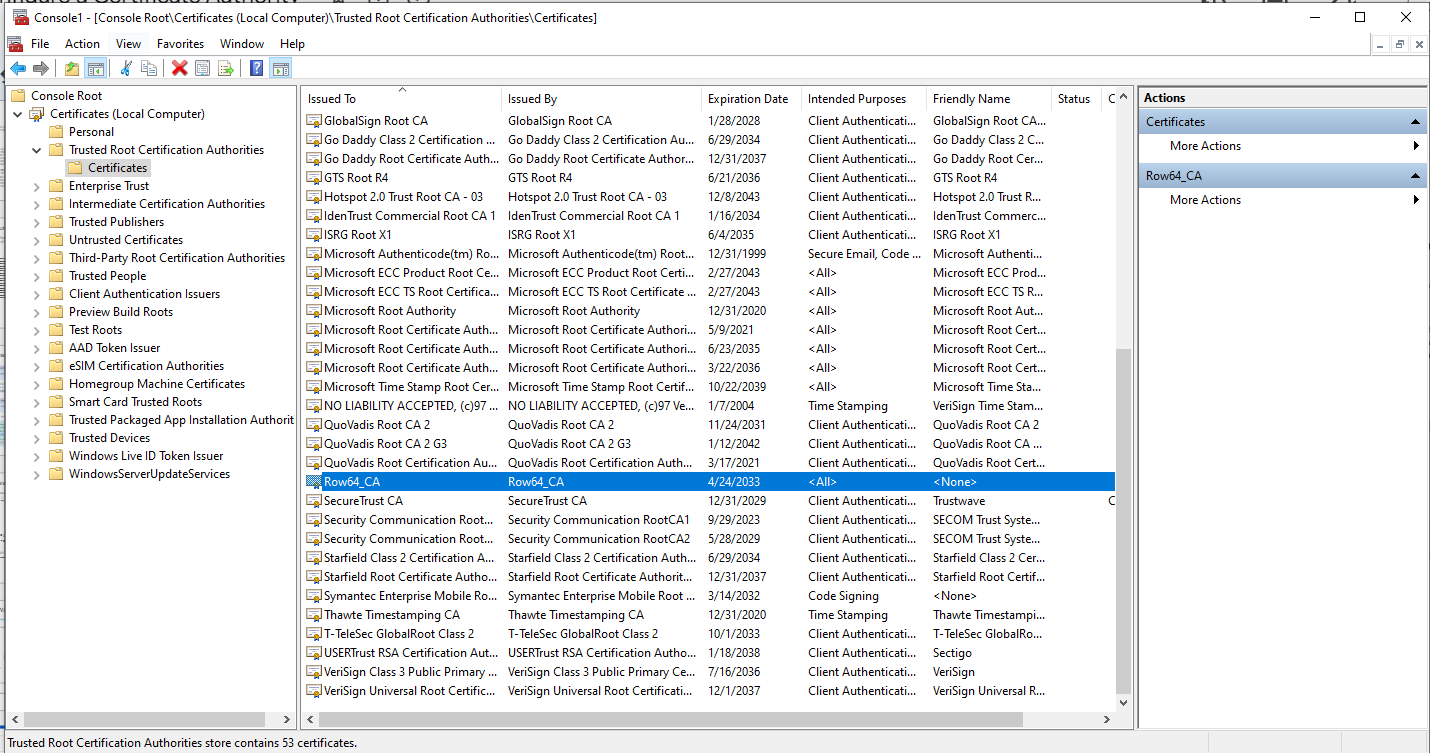
Note
When you close this window, it will ask if you want to save the console. Just select NO and exit.
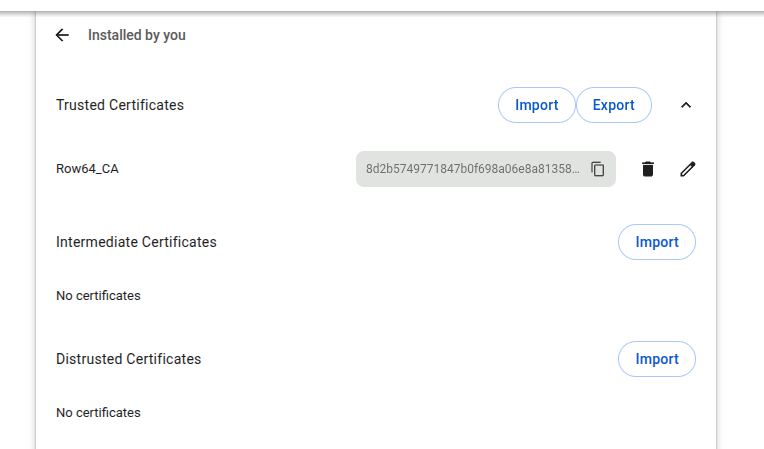
Verify on Chrome
Check to see if you can see it in Chrome. Go to: chrome://settings/security
Scroll down and look for Manage Certificates. Then click into the Installed by you section. In the Trusted Certificates section, import your Row64 ca.crt file.
Import Certificates to Firefox
If you are using Firefox as your browser, you will need to import the ca.crt certificate directly.
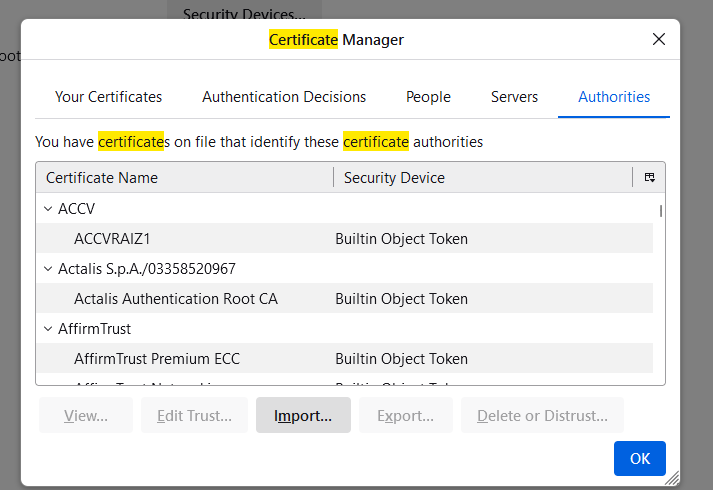
Open the Firefox settings and search for "certificate." Click on View Certificates.
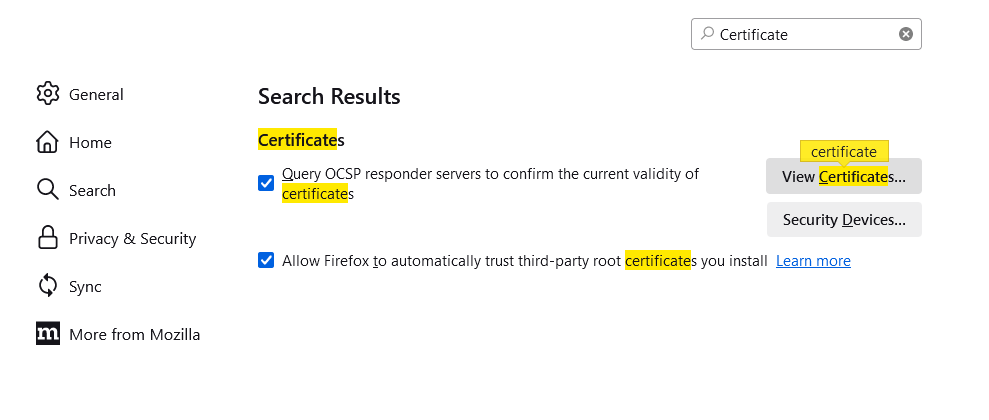
Check the box to trust the CA to identify websites.
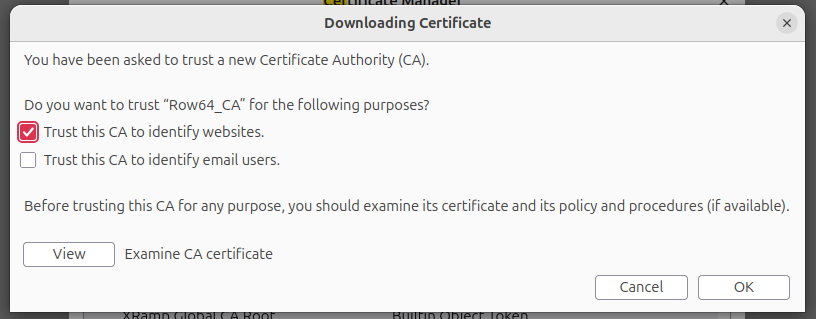
Click Import.
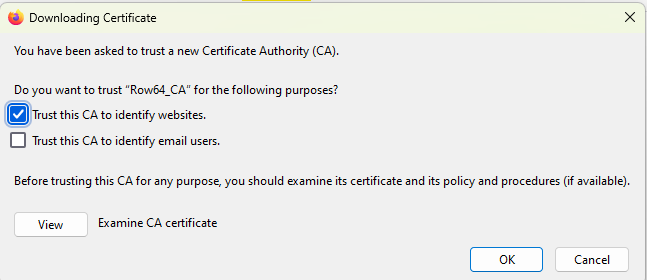
Check the box to trust the CA to identify websites, and click OK.
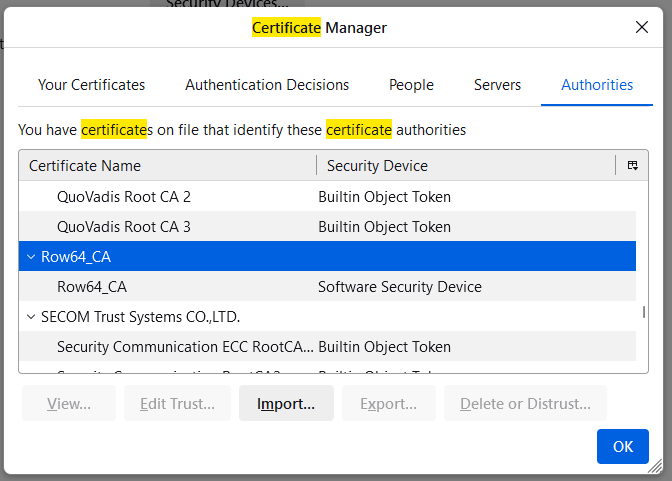
You should see Row64 in the list.
Verify Operation
Verify HTTPS is Working
In your browser, go to: https://YourServerIPAddress
(Replace YourServerIPAddress with the IP address of your server).
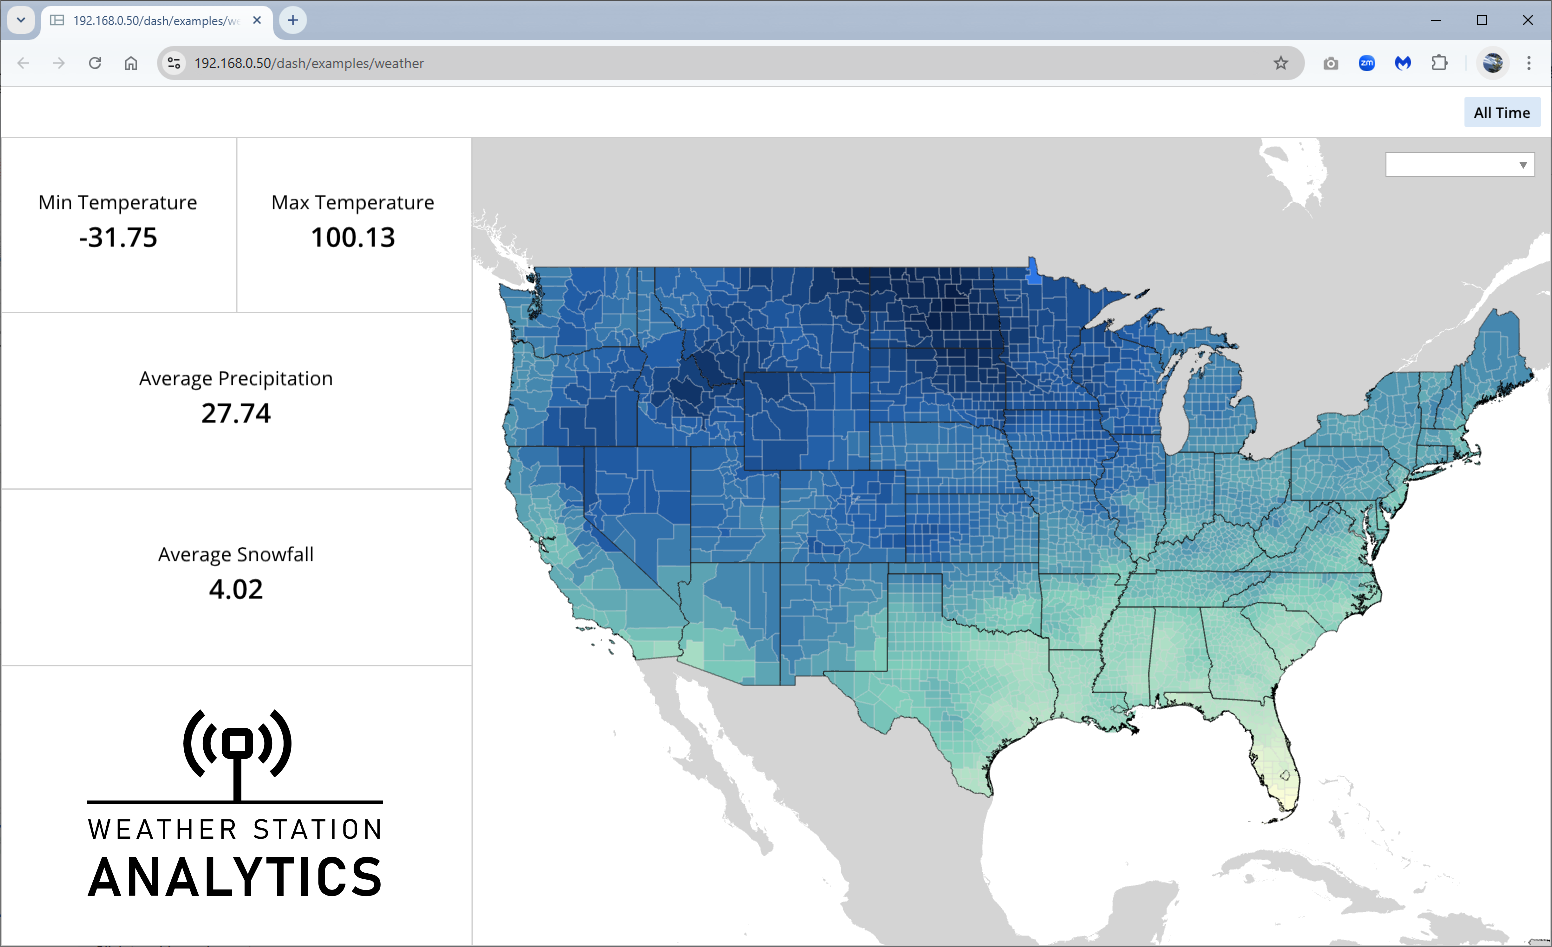
You should see a secured connection to the Row64 Default Page.
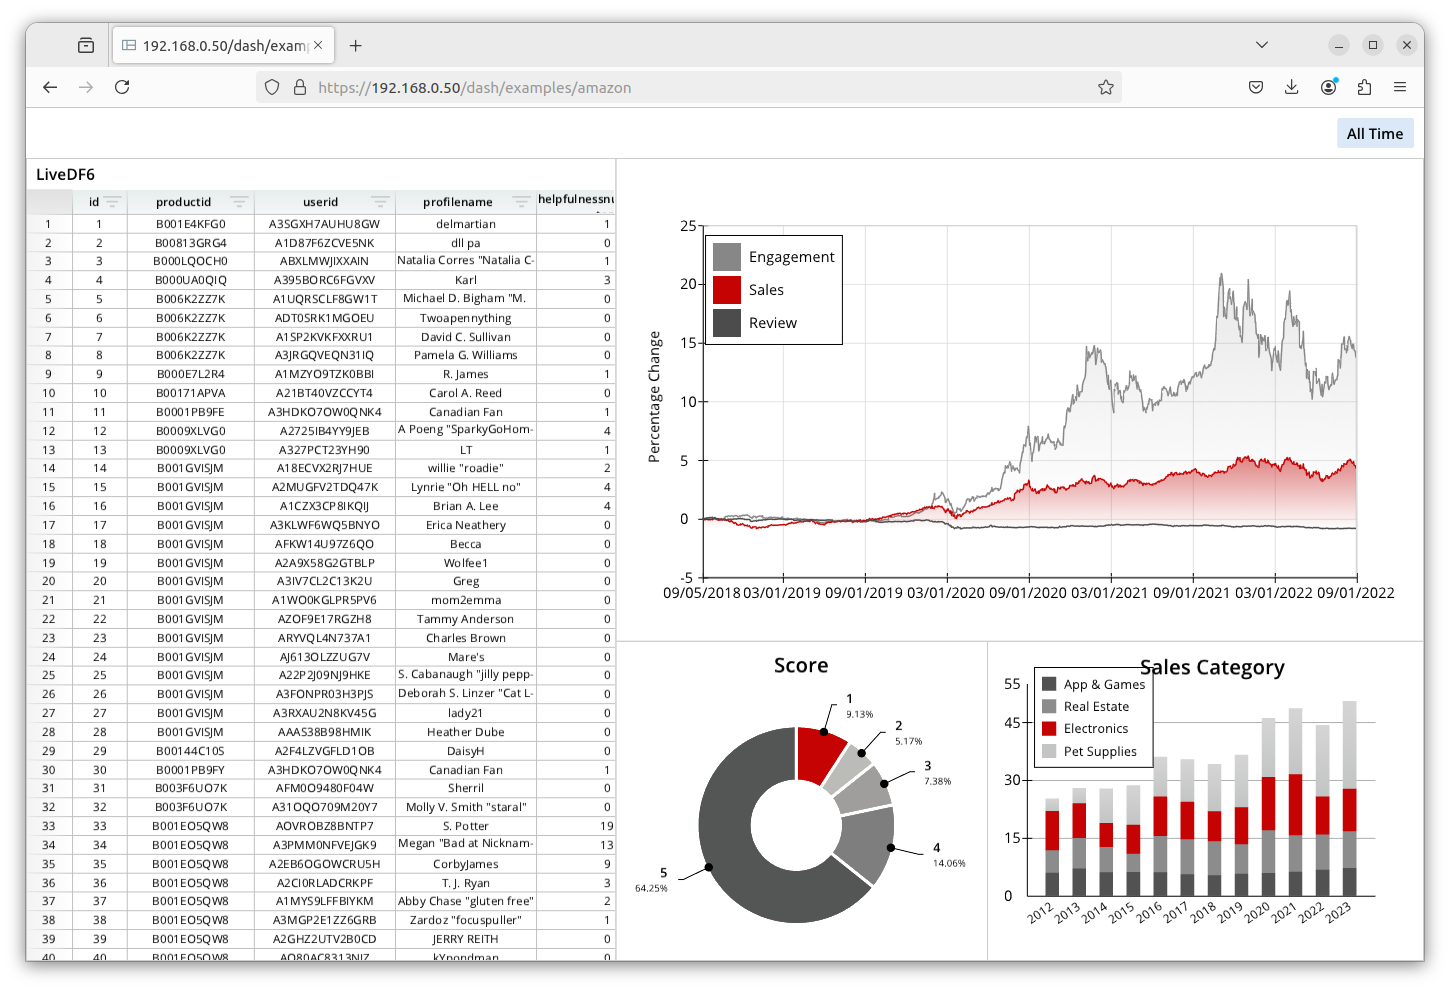
Verify HTTPS Dashboards are Working
In your browser, go to: https://SERVER_IP/dash/examples/amazon
(Replace SERVER_IP with the IP address of your server).
Connect Studio to HTTPS
In the Row64 Studio application, connect to your server. Navigate to the Connect tab and click on Browse to open an example dashboard.